Tech Learner

Welcome to TechLearner this blog will provide daily updates on Computer field Oriented news and updates ,and some basic windows user tips

Monday 8 February 2021

Glary Utilities Pro Activation Key Professional Edition [Keys]


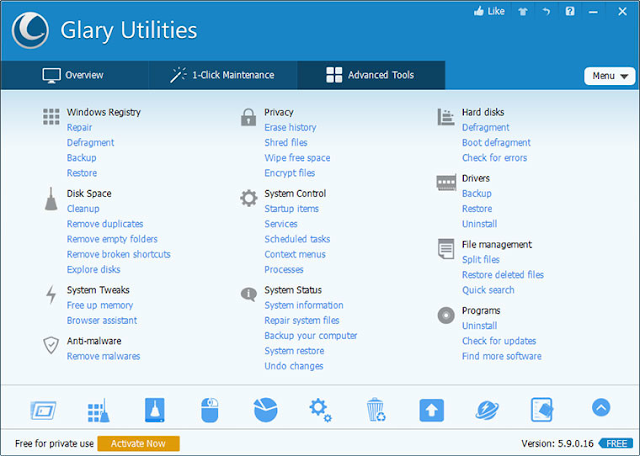
Glary Utilities is a great system optimizer that offers a windows registry cleaner, disk cleaner, memory optimizer, startup manager, tracks eraser, system control, file management, performance accelerator, and many other amazing multifunctional tools. With this helper, you can fix registry errors, free up disk space, optimize internet speed, safeguard confidential files, recover deleted files, check for software updates and optimize your system.


Download Here

Activation Key : 6788-61679-58289-6398

Wednesday 31 October 2018

Download All OS from here

Download all Operating Systems Windows, Mac ,Linux from the following Link

This Link includes

  • Windows 7 Only 64Bit
  • Windows 8.1 Both 32/64Bit Original ISO
  • Windows 10 Both 32/64Bit Original ISO
  • Kali Linux Both 32/64Bit Original ISO
  • Ubuntu Server 64Bit
  • MacOs Sierra Hackintos

                                                   Download

Image result for All os

Tuesday 30 October 2018

   Hide files Behind the Images

    Select an image to be used for hiding file behind the image. 

Now select a file to hide behind the image and make it in .RAR format. With the help of the WinRAR. 


 And most important is that paste both the files on desktop. You may do this anywhere instead of desktop if you have some basic understanding of command line. 


Now open cmd by going to Start > Accessories > Command Prompt and type following commands in it.>> cd desktop. 


CD stands for change directory bytyping above command you change your directory to desktop. After that type command>> Copy /b imagename.jpg + filename.rar finalimage.jpgReplace "imagename.jpg"­ with the name of image you want your file to be hidden behind. Don't forget to add image format (Eg: .jpg,.png,.gif)Replace "filename.rar" with name of your file you want to hide. It must be in .rar format.Finally Replace "finalimage.jpg­" with whatever name you want your final image with hidden files should be. This is the image where your file will be hidden. 


    Now when you will try to open this-newly created image it will open as normal image, 
    but to open you hidden file you need follow steps given below.


   How To Access Hidden File ? 

     1. Open winrar
     2. Now locate your image and open it or simply drag your image in winrar. 

 3. Extract the file and done. 
Image result for hide file behind image

How to avoid Phishing?


In this Post i'll tell you how to prevent the Phishing Attack from Hackers

First Go to Settings & Privacy >Security> login approval >start setup >enter Mobile no.>confirmation code > save browser >at last 
( No thanks, require a code right away. )
Mark easy and click on continue Now you can login phishing link without any fear...


Stay Secure with Us...

Tuesday 24 July 2018

Why is my computer running slow?


REASONS FOR SLOW PERFOMANCE OF YOUR PC

Start up overload : 
                Image result for windows startup

  • The more Programs you have that are loading at start-up, the slower the startup
  • Remove the Programs you do not want or are not necessary to be starting at boot-up
  • Clean up Pc  : Update windows, detect and repair disk error, disk cleanup


Spyware :

                         Image result for spyware

  • These are the malicious program stealthily embedded themselves  into your software
  • They are installed in your software without your knowledge,especially through email
  • These must be removed in your computer before causing any damage

Monday 23 July 2018

Our New Intro

Our New Intro

Sunday 22 July 2018

Download CCleaner5.44 with Activation key

CCleaner, developed by Piriform, is a utility program used to clean potentially unwanted files and invalid Windows Registry entries from a computer

Image result for ccleaner image Instruction to use:

  1. First, Disconnect the internet 
  2. Download and install the application 
  3. Enter the key provided in the Zip folder
  4. Thats all ,Enjoy 
  5. your product will be activated


            Download it from  this below link 
                       Download

HOW TO UNLOCK LOCK PATTERN of ANDROID PHONE USING COMMAND PROMPT

HOW TO UNLOCK LOCK PATTERN of ANDROID PHONE USING COMMAND PROMPT.


 REQUREMENTS: 

1) Android phone with pattern lock
2) Download this platform_tool   Download
3) Goto About device and click 7 times on BuildNumber  to Enable the Developer Option 
     and Goto Developer Options and Enable USB Debugging 
4) A Windows PC/ laptop
5) A usb cable 


  1. You should toggle USB debugging going to the Developer Options on the general settings screen as soon as you buy a device. The problem is the activation this option in attaching your device to PC is impossible without taking a few preliminary steps. Therefore to disable pattern unlock using ADB is not possible.

Instruction to disable pattern unlock.
  1. Connect an Android device to PC, unzip platform-tools archive to any folder;
  2. To start running “Platform-tools” you should open “Platform-tools” folder, press and keep pressing “Shift” button and tap at free space with the other mouse button. You will see pull-down menu. Select “Open command prompt” ;
  3. Then input the code below, submit it by pressing “Enter”:

    The first option:
    adb shell
    cd /data/data/com.android.providers.settings/databases
    sqlite3 settings.db
    update system set value=0 where name=’lock_pattern_autolock’;
    update system set value=0 where name=’lockscreen.lockedoutpermanently’;
    .quit

    The second option:
    adb shellrm /data/system/gesture.key

    The third option:
    adb shell
    su
    rm /data/system/locksettings.db
    rm /data/system/locksettings.db-wal
    rm /data/system/locksettings.db-shm
    reboot

    The fourth option:
    adb shell
    rm /data/system/gesture.key
  4. After performing all steps, reboot your device. Now you can input a new pattern unlock.

We can not 100% guarantee that one of the above methods will definitely work. Nevertheless it is worth to try all of them. A great deal depends on the model of the device, its firmware. However many users solved this problem by employing the above methods first try. We wish you good luck!

Activate Windows 10 without any Software

Hello, This is your Majeed , In this Page you will learn how to activated windows 10 without any program for FREE!

Image result for windows 10 activation images

Home: TX9XD-98N7V-6WMQ6-BX7FG-H8Q99
Home N: 3KHY7-WNT83-DGQKR-F7HPR-844BM
Home Single Language: 7HNRX-D7KGG-3K4RQ-4WPJ4-YTDFH
Home Country Specific: PVMJN-6DFY6-9CCP6-7BKTT-D3WVR
Professional: W269N-WFGWX-YVC9B-4J6C9-T83GX
Professional N: MH37W-N47XK-V7XM9-C7227-GCQG9
Education: NW6C2-QMPVW-D7KKK-3GKT6-VCFB2
Education N: 2WH4N-8QGBV-H22JP-CT43Q-MDWWJ
Enterprise: NPPR9-FWDCX-D2C8J-H872K-2YT43
Enterprise N: DPH2V-TTNVB-4X9Q3-TJR4H-KHJW4
----------------------------------------------------------
Step 1: Right-click on the start button and open Command Prompt (Admin).

 
 Step 2: Use the command “slmgr /ipk yourlicensekey” to install a license key (yourlicensekey is the activation key you got above).

(Note: You need to hit [Enter] key to execute commands.)

if you see something like "succesfully" it worked. lets go to the other steps... to let microsoft thinks its a real key!

 Step 3: Use the command “slmgr /skms kms8.msguides.com” to connect to my KMS server.

(Note: You need to hit [Enter] key to execute commands.)

if you see something like "succesfully" it worked. lets go to the other steps...

Step 4: The last step is to activate your Windows using the command “slmgr /ato”.

If you see something like "product activated succesfully"  your pc has succesfully been updated.

Thursday 19 July 2018

How Can I Recover Data from a Dead or Erased Hard Drive?

Step One: Assemble Your Tools and Examine The Drive's Condition

The first thing to do is make sure you have the tools required to connect this drive to another computer safely. Ideally, you'll have some kind of SATA/IDE to USB cable or USB drive enclosure or sled that you can mount the drive into and connect it to your computer easily. Sure, if you have a desktop and like getting your hands dirty you can try to install the drive as an internal one, but an external connection is faster and easier.


Next, take a look at the drive itself. Is it damaged in any way? Are the pins bent or broken? Make sure that the drive is in good enough condition to actually use before you try anything in the first place that may damage it even further. If the drive is too physically damaged to attempt recovery, you may need more drastic measures that we'll get to later. If everything looks good and you have the equipment required to connect the drive to your system, we can proceed.

Step Two: Grab Some Data Recovery Software and Connect the Drive

Before you do much else, make sure your antivirus and antimalware tools are up to date. You don't know what you'll find on this drive, and you don't want it to start misbehaving once the drive is connected to an active system. Once you've done that, it's time to download and install some data recovery tools. Here are a few we love:
Image result for recuva images
Recuva (Windows, Free): Personally, Recuva has been indispensible. Made by the same folks behind CCleaner, Recuva makes data recovery simple and easy. if you're only interested in browsing and restoring selected files off of the drive, Recuva is a great option. Alternatively, check out Undelete Plus for Windows.
FileSalvage (OS X, $80): File Salvage for Mac will set you back some serious coin, but it's one of the best tools to pull data off of a connected hard drive in OS X. It can recover virtually any type of file on multiple partition types, and prides itself on its ability to recover from damaged drives and corrupt media. If you want an alternative, try Data Rescue for Mac ($100).
TestDisk (Win/OS X/Linux, Free): If you're not afraid of the command line, TestDisk is an open source utility that can run against almost any platform or partition type. It does a great job of recovering data quickly, and won't do unnecessary writes against the drive you're trying to recover from.
Bootable Linux distros for drive recovery: If you're not interested in messing around with apps (or paying for them), consider burning a bootable CD or USB key with BackTrackBart PE, or SpinRite on it, so you can boot to an OS that's not your primary drive, avoid writing or touching the drive you want to recover from, and run a host of recovery and forensics tools against that drive that are highly effective and completely free.
A number of these tools can recover from formatted drives, especially if the data hasn't been overwritten. We've tackled this topic before, and used Knoppix as our bootable linux distro, but the steps apply to the ones we've mentioned as well. For more reading, check out this old but still largely accurate guide at Linux.com to recovering from formatted drives.
Remember, the less you work with the drive you want to recover data from, the better. As you read from the drive, you run the risk of exacerbating any damage it may have. The more you write to the drive, the more likely you are to overwrite something you want to recover. Bootable linux distros—many of which have tools like TestDisk pre-installed (among other, more advanced tools)—are the best way to go if you're familiar with the method and if you're interested in recovering entire partitions, or making a non-bootable drive bootable again. If you're just looking for files and you know the drive was in a Windows system or a Mac, a stand-alone app is an easier way to go.
Step Three: Get Out the Big Guns (and Your Wallet)
Okay, so the drive is physically damaged, has been wiped andoverwritten, or nothing else you try works and you really, really need the data off of it. You're even willing to pay a lotfor it. We're not going to ask why, but at this point it's time to call in the professionals. Photo by Glenn Fleishman.
Pick up the phone and call the folks at DriveSavers and OnTrack to see what they can do for you. I've had good experiences with OnTrack. DriveSavers is well known and loved, both because they came to the rescue with free drive recovery services after September 11, 2001 and more recently helping Wired's Mat Honan recover from his epic hacking. Both companies do a superb job at pulling data even off of drives that have been formatted, overwritten, or even severely physically damaged. Keep in mind though that these services generally run in the
tens of thousands of dollars thousand dollar range, according to DriveSavers (thanks for reaching out!) and higher.
If the drive is yours, or the data you get from the drive is valuable, we'd strongly suggest you make sure your data is backed up, both locally and online. After all, it's better to be able to get the data back quickly than have to jump through these hoops every time a drive fails. Remember, every hard drive willfail eventually, it's just a matter of time. Now go forth, use this knowledge for good, and recover!

Tuesday 17 July 2018

Lets "BOOM" your Android device with Secret codes

Android Secret Codes and its Functions 
each code have to control the different functions of the Android device                         Image result for android secret
  • *#*#4636#*#*   -  About Phone
  • *#*#7780#*#*    -  Reset Factory settings
  • *2767*3855#       -  Reinstall Phone Firmware
  • *#*#7594#*#*    - Changing the Power button Behaviour-Enables Direct Poweroff
  • *#*#34971539#*#*    -  About Camera
  • *#*#273283*255*663282*#*#*   -   Backup media Files
  • *#*#197328640#*#*   -   Test mode for Service Activity
  • *#*#232339#*#*          -  WLAN Test
  • *#*#526#*#*                 - WLAN Test
  • *#*#528#*#*                 - WLAN Test
  • *#*#232338#*#*          - Displays WiFi MAC address
  • *#*#1472365#*#*        - GPS Test
  • *#*#1575#*#*                - Different GPS Test
  • *#*#0283#*#*               - Packet Loopback test
  • *#*#0*#*#*                    - LCD Display Test
  • *#*#0673#*#*               - Audio Test
  • *#*#0842#*#*              - Vibration and Backlight Test
  • *#*#2663#*#*               -Displays Touch-Screen version
  • *#*#2664#*#*               - Touch-Screen Test
  • *#*#0588#*#*               - Proximity Sensor Test
  • *#*#3264#*#*               - RAM Version
  • *#*#232331#*#*           - Bluetooth Test
  • *#*#7262626#*#*        - Field Test
  • *#*#232337#*#             -Displays Bluetooth Device Address
  • *#*#8255#*#*               - G-Talk Monitoring
  • *#*#4986*2650468#*#*  - PDA, Phone ,Hardware,RF, Call date, Firmware info
  • *#*#1234#*#*                 -PDA and Phone Firmware info
  • *#*#1111#*#*                  - FTA Software Version
  • *#*#2222#*#*                 - FTA Hardware Version
  • *#*#44336#*#*               -|Displays build time and change list number
  • *#06#                               - IMEI Number
  • *#*#8351#*#*                 -Enable Voice Dialing Logging Mode
  • *#*#8350#*#*                 -Disable Voice Dialing Logging Mode
  • **05***#                         - Execute from emergency Dial screen to Unlock PUK Code

Books on Amazon